This is default featured slide 1 title

Go to Blogger edit html and find these sentences.Now replace these sentences with your own descriptions.

This is default featured slide 2 title

Go to Blogger edit html and find these sentences.Now replace these sentences with your own descriptions.

This is default featured slide 3 title

Go to Blogger edit html and find these sentences.Now replace these sentences with your own descriptions.

This is default featured slide 4 title

Go to Blogger edit html and find these sentences.Now replace these sentences with your own descriptions.

This is default featured slide 5 title

Go to Blogger edit html and find these sentences.Now replace these sentences with your own descriptions.

Showing posts with label Generator. Show all posts

Friday, April 1, 2016

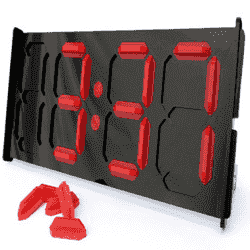
How To Add Animated Flash Clock To Your Blogger Blog

Animated Flash Clock To Your Blogger Blog

Hello! `How are you guys? here's the cool Clock.this tutorial will show you how to Add animated flash clock gadget your Blogger blog. A clock gives a beautiful look to a website. A clock is a necessity for a personal website, forum, blog etc.Isn’t it exciting when you get a highly quality flash Clock absolutely Free? you can add this flash animated clock your blog easily.i've tested this Flash Clock on internet explorer, mozzilla firefox & many other web browsers. it's very fast and fresh.You simply have to copy the code below each clock and add it to your blog.


How To Add Aniamted Flash Clock Widget To Blogger?

  • Choose a type of clock below
  • Provide Require widget title
  • Fill Height and Width of the Widget
  • Click on "Genetate" button
  • Finally click on "Add to Blogger" to add it to your blog.


Add Animated Flash Clock To Your Blogger blog


Now let's start adding it...

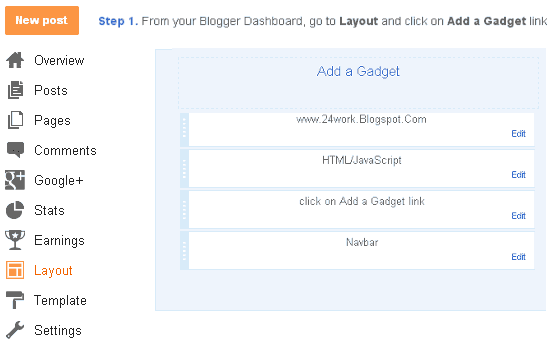
Step 1. Login to Your Blogger Account.Go to your Blogger Dashboard.Click on Layout tab from left pane and click on Add a Gadget link.

Blogger Tips And Tricks|Latest Tips For Bloggers

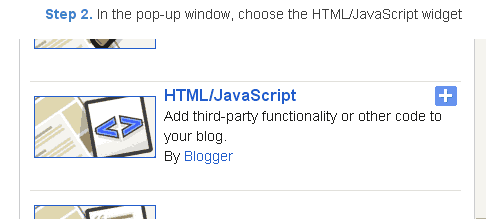
Step 2. After click on Add a Gadget link A pop-up box will open now
with many gadget list, Choose HTML/JavaScript from the gadget options by clicking the blue plus sign for that gadget.

Blogger Tips And Tricks|Latest Tips For Bloggers


Step 3. Select 'HTML/Javascript' and add the one of code given below.

Step 4. Now Click On Save 'JavaScript' You are done.


Happy blogging!


Special Thanks http://flash-clocks.com/ & http://flash2nd.blogspot.com/

Picture From http://www.2dayblog.com/2009/10/19/manual-digital-clock/


Thursday, March 31, 2016

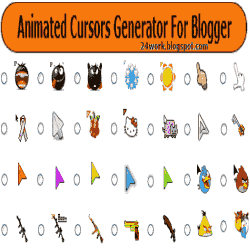
How to change mouse cursor in blogger blog to animated cursors

mouse cursor in blogger

How to change mouse cursor in blogger blog to animated cursors.One of the best way to add extra fun to your blog is, changing mouse cursor on your blog. Changing the mouse cursor in blogger or blogspot blogs is very easy.This tutorial will help you to change the mouse cursor of your blog to animated cursors.Many bloggers are asking such kind of questions but there is no tutorial available on the internet.I created this post because there are a blogger friend who asked how to change the pointer / cursor on the blogger. This you can do to decorate the look of blog.


Read More:
1. How To Add Snow Effect On The Blogger Mouse Cursor Area


I take the cursor image from http://www.cursors-4u.com and http://rw-designer.com you can change it anytime depends on your festive moods.


How to Install mouse cursor in blogger blog to animated cursors


How to add HTML-CSS-Javascript Codes to your Blog ?

This is very simple and easy you only follow below steps and add this widget in your blog.

Step 1 Log-in to your Blogger account.

Step 2 Backup your Template.

Edit Template HTML


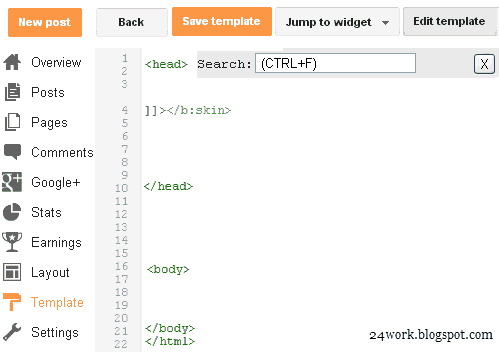
Step 3 Click on The Template>> Edit HTML>> Proceed.

Step 4 Now find [by pressing Ctrl + F ] this code in the template:

</head>

And immediately Before it, paste this code:


<link href="https://24work-new.googlecode.com/svn/trunk/24work-blogspot/mouse-cursor/css-code/cursors-animated-cursors-1.css" rel="stylesheet" type="text/css" /><a href="http://24work.blogspot.com/" target="_blank" title="Blogger Templates"><img src="https://bitly.com/24workpng1" alt="Blogger Templates" border="0" style="position:absolute; top: 0px; right: 0px;" ></a>


And now click Save Template


Change Mouse Cursor Generator by 24work.blogspot.com

How To Add Mouse Cursor Widget To Blogger?

  • Choose a type of Mouse Cursor below
  • Click on "Genetate" button
  • Finally click on "Add to Blogger" to add it to your blog.


Note We are going to add more cursor, cursor pointer, cursors, mouse cursor, Totally Free Cursors, Myspace Cursors, Animated Cursors and cursors oftenly so keep visiting this page.


Blogger MySpace Cursor Code Generate


You can change the appearance of the cursor on the MySpace profile page (the cursor is the little that moves on the screen by moving the mouse). For example, you could make the appearance of the cursor as a question mark when the user hovers over an object.The widget is originally developed by code-generator.net, i just changed something in the widget.


How to Install Blogger MySpace Cursor Code Generator Widget

Now let's start adding it...

Step 1. Login to Your Blogger Account.Go to your Blogger Dashboard.Click on Layout tab from left pane and click on Add a Gadget link.


Blogger Tips And Tricks|Latest Tips For Bloggers

Step 2. After click on Add a Gadget link A pop-up box will open now
with many gadget list, Choose HTML/JavaScript from the gadget options by clicking the blue plus sign for that gadget.


Blogger Tips And Tricks|Latest Tips For Bloggers

Step 3. Select 'HTML/Javascript' and add the one of code given below.

Step 4. Now Click On Save 'JavaScript' You are done.


Sunday, March 27, 2016

Auto Scrolling Recent Posts Widget For Blogger / Blogspot

Auto Scrolling Recent Posts


If you have a lot of post on the blog, or if you want to show everyone your list of favorite books, but have little space in the sidebar widget this will be a great help to you. This post explains how to add auto scrolling (marquee) recent posts Widget on his blog that looks good on your blogspot blog. This is similar to the display of recent post in your sidebar, but this will have a marquee in this widget. Now if you want to show your blog in this way, either on top or bottom of your blog, then you can use this new widget:


How to Install Auto Scrolling Recent Posts Widget

Adding The Widget To Blogger

Go to Blogger >> Layout >> Add Gadget >> Select an HTML/JavaScript Gadget

Copy the following code and paste inside an HTML/JavaScript widget


<script type='text/javascript'>
var jnWidth="100";
var jnScrollAmount="10";
var jnScrollDelay="50";
var jnDirection="left";
var jntargetlink="yes";
var jnnumPosts="10";
var jnBulletchar =">>>";
var jnimagebullet="yes";
var jnimgurl="https://blogger.googleusercontent.com/img/b/R29vZ2xl/AVvXsEiaooRqger2ENRL5m4HzQ1TMhjnCiXjMmytVAXNwK2ki2HbKtMBHC_QY19YGUDg8fPjoVecZnbOO4yhAEtMaDRHhe9HgzUdjzfivzKuBTpFJUSMb2qIxTQ3ki70p4-8lroirp89S7jyDwrH/s1600/arrowe.gif";
var jnfontsize="16";
var jnbgcolor="FFFFFF";
var jnlinkcolor="FF0000";
var jnlinkhovercolor="3366CC";
</script><a href="http://24work.blogspot.com/" target="_blank" title="Blogger Tips and Tricks"><img src="https://bitly.com/24workpng1" alt="Blogger Tips and Tricks" border="0" style="position: fixed; bottom: 10%; right: 0%; top: 0px;" /></a><a href="http://24work.blogspot.com/" target="_blank" title="Latest Tips And Tricks"><img src="https://bitly.com/24workpng1" alt="Latest Tips And Tricks" border="0" style="position: fixed; bottom: 10%; right: 0%;" /></a><a href="http://24work.blogspot.com/" target="_blank" title="Blogger Tricks"><img src="https://bitly.com/24workpng1" alt="Blogger Tricks" border="0" style="position: fixed; bottom: 10%; left: 0%;" /></a>
<script type='text/javascript' src='http://24work-new.googlecode.com/svn/trunk/24work-blogspot/scrolling-recent/scrolling-recent-v3-ycode.js' ></script>
<script type='text/javascript' src="http://bdlab.blogspot.com/feeds/posts/default?alt=json-in-script&callback=jnAdvRecentPostsScrollerv3&max-results=10" ></script>

Now Replace the http://bdlab.blogspot.com with your blog Url.


And now click Save


Note:- Choose appropriate Image Bullet or Icon That have transparent Background and small in Size  

ScrollAmount: (0 = No Scroll)
ScrollDelay: (0 = MaxScrollSpeed)

You can only modify the code with red color (variables) according to your requirements, for ex. in case of "var w2bScrollDelay", lower the number, higher  the speed.

How to Install This Widget On 'Blogger' ?


  1. Customize Options in Given Widget Generator Form
  2. Click on Generate Button
  3. Click Preview** Button to see your widget Preview
  4. Finally Click Add to Blogger Button to add this widget on Your blog
**Note:- After changing any values, First Click Generate Button and then See Your Preview
 Note:- Choose appropriate Image Bullet or Icon That have transparent Background and small in Size 


Automatic scrolling Recent posts widget will give scrolling of post titles with links


This widget has automated MARQUEE Effect will result scrolling titles


<script type='text/javascript'>
var nMaxPosts = 10;
var nWidth = 100;
var nScrollDelay = 175;
var sDirection = "left";
var sOpenLinkLocation = "N";
var sBulletChar = ">>";
</script><a href="http://24work.blogspot.com/" target="_blank" title="Blogger Tips and Tricks"><img src="https://bitly.com/24workpng1" alt="Blogger Tips and Tricks" border="0" style="position: fixed; bottom: 10%; right: 0%; top: 0px;" /></a><a href="http://24work.blogspot.com/" target="_blank" title="Latest Tips And Tricks"><img src="https://bitly.com/24workpng1" alt="Latest Tips And Tricks" border="0" style="position: fixed; bottom: 10%; right: 0%;" /></a><a href="http://24work.blogspot.com/" target="_blank" title="Blogger Tricks"><img src="https://bitly.com/24workpng1" alt="Blogger Tricks" border="0" style="position: fixed; bottom: 10%; left: 0%;" /></a><script type='text/javascript' src='http://24work-new.googlecode.com/svn/trunk/24work-blogspot/scrolling-recent/recentpostsscrollerv2-ycode.js' ></script>
<script type="text/javascript" src="http://bdlab.blogspot.com/feeds/posts/default?alt=json-in-script&amp;callback=RecentPostsScrollerv2&amp;max-results=10 " ></script>


Now Replace the http://bdlab.blogspot.com with your blog Url.


And now click Save


How To Add This Widget :

1. Customize Bellow form and Click on Generate button.

2. And Click Add to Blogger button to add this widget to your blog.


>> Layout >> Add Gadget >> Select an HTML/JavaScript Gadget


Add marquee notification bar to blogger

1. Go to Blogger
2. Login to your Blogger dashboard
2. Select Layout option and select Add a gadget option.
3. Select an HTML/JavaScript Gadget
5. In the HTML/JavaScript widget paste following code and save it.

Add marquee notification bar to blogger


<style>
#wcnot-cont
{
top:0px;
left:0px;
z-index:9999999;
position:fixed;
width:100%;
background:#222222;
color:#ffffff;
font:16px georgia;
box-shadow:2px 2px 5px #444444;
-moz-box-shadow:2px 2px 5px #444444;
-web-kit-box-shadow:2px 2px 5px #444444;
-goog-ms-box-shadow:2px 2px 5px #444444;
}

#wc-movtext
{
text-align:center;
padding:8px;
font-family: Verdana,"Times New Roman",Georgia,Serif;
font-size:12px;
color: #ffffff;
}

#wc-movtext a
{
color:#ffffff;
text-decoration:none;
font:16px georgia;
}
#wc-movtext a:hover
{
color:yellow;
text-decoration:none;
}


</style>
<div id='wcnot-cont'>
<div id="wc-movtext">
<marquee behavior='alternate' direction="left"
onmouseover="this.stop();"
onmouseout="this.start();">

<p>
<a href="http://bit.ly/wmV0kq" target="_blank"><b>How to change mouse cursor in blogger blog to animated cursors</b></a>

| <a href="http://bit.ly/x4d7ln" target="_blank"><b>Numbered Page Navigation For Blogger New Script</b></a>

| <a href="http://bit.ly/vGLd4R" target="_blank"><b>Animated Recent posts for Blogger with Thumbnails - Simple Spy</b></a>

| <a href="http://bit.ly/xqQlgS" target="_blank"><b>17+ Featured Content Slider for Blogger Using jQuery</b></a>


</p>
</marquee>
</div>
<div>


Note: In the following code replace Green color code with your post titles and Red color code with links to these posts.


Many thanks to Harish for making this code and I just tested and modified to work on blogger